~Turning an Old SLR Into an Accent Light~
The
death of film is tragic. Photography has become too easy to be fun; the
magic is lost. Even large format is irrelevant with the advent of
automatic stitching software. They took our Kodachrome away!
Changing mental tracks... One
can paint with light, highlighting walls, furniture, and decorations
with varying diffusion, direction, and color. The living space displays
at IKEA are fantastic examples of how to do this well. Light sources
themselves, however, could be more interesting, although I respect IKEA
for having the boldest light designs around.
Put some of the magic back into a discarded film camera and turn it into an interesting indoor spotlight for about $10 and 30 minutes.
The idea is simplicity. You just want to put a light in place of the film in a camera and the camera becomes the reverse of a camera (it become a projector). Very many incarnations of this arrangement can be imagined and what I show below is but one. Any camera can be used although SLRs are plentiful and well suited.
Note, the below instructions will result in a camera heretofore unusable for taking pictures because the LED is glued in place. Also, the cheapest single illumination LED with power cable I've found is the guts of a Jansjo Ikea desk lamp (the version with the weighted base goes for $10), and that too will be destroyed. A nice alternative if you don't want to hurt any cameras or Jansjos is to open the camera's film back and position the Jansjo so that it's pushed into the rear. The shutter will need to be held open which will only happen non-destructively with an all-mechanical shutter that can be kept open in "B" (bulb) mode. While the result is not as elegant as the instructions below this will serve the purpose of using the camera's optics to create a concentrated spotlight for creative lighting.
Find an unsuspecting Jansjo, or any compact white LED intended for illumination (not indication). LED tech is changing fast but right now the best option I've found from a cost-vs-simplicity standpoint is one of these here Jansjos. You get a bright LED with a power switch that you can plug right into an outlet:
image
Pry off the plastic lens and remove the LED:
image
The cord will need to be cut:
image
And soldered back together:
image
Attach it to the back plate on the camera. Epoxy works well:
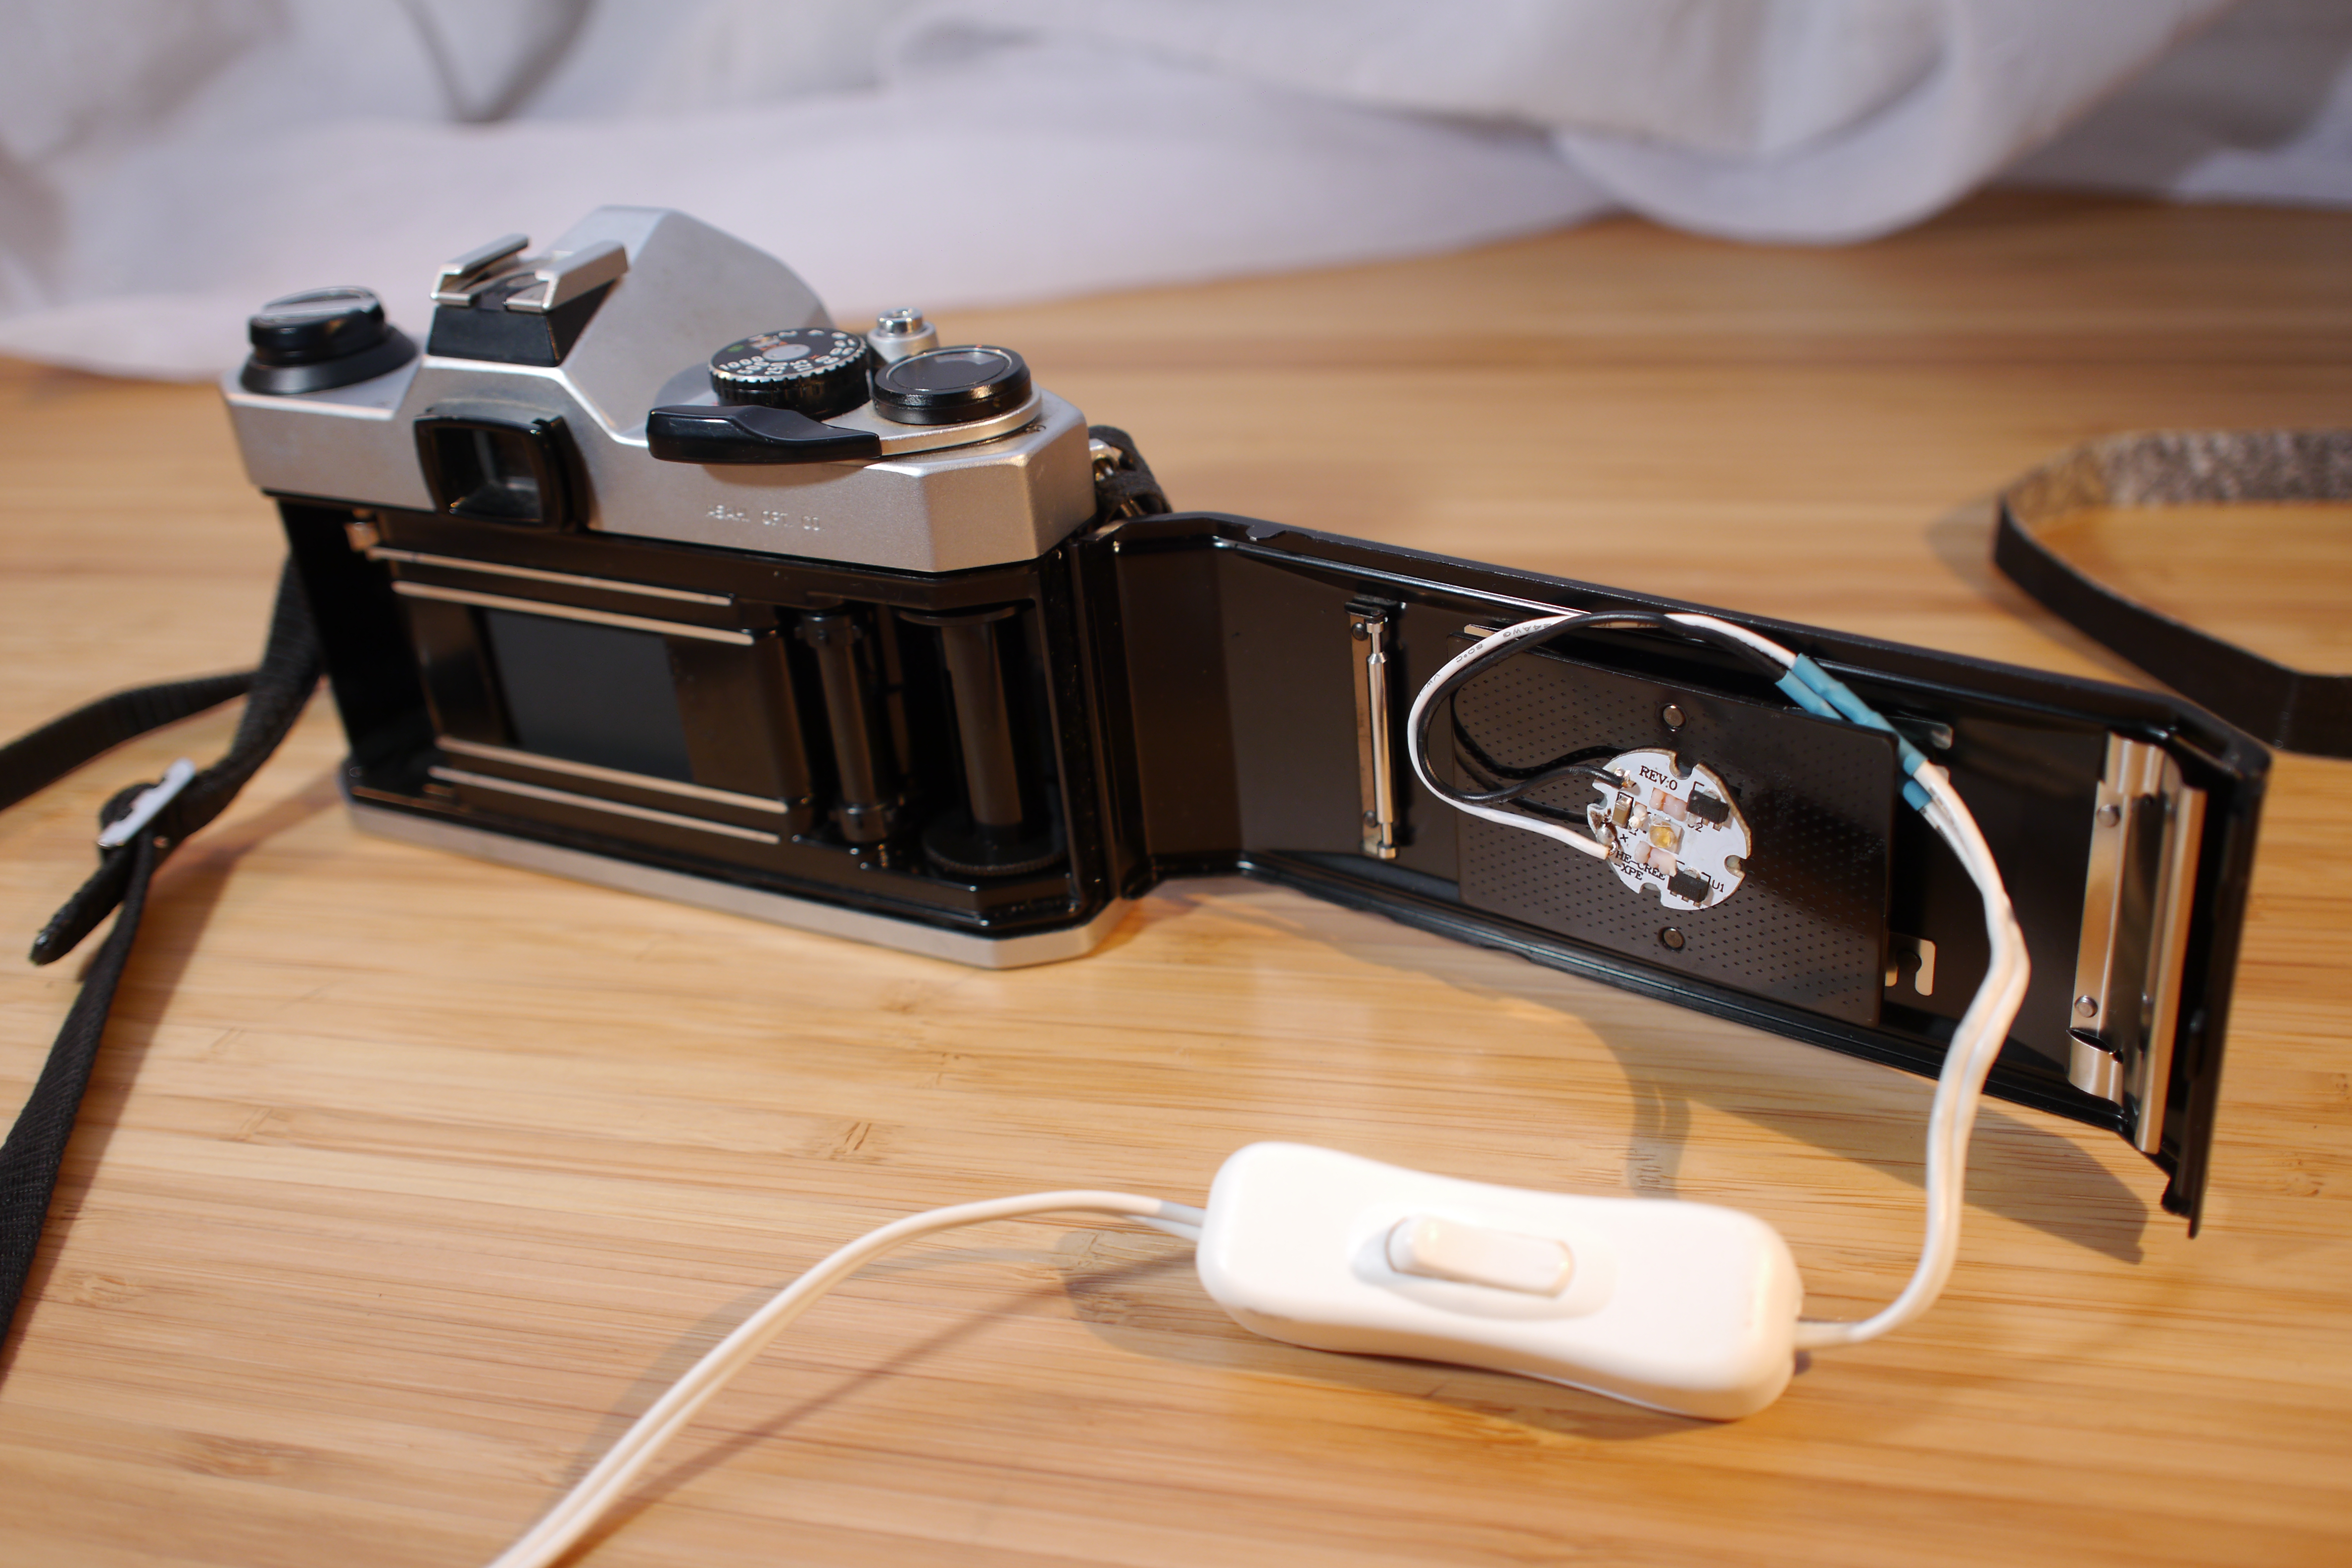
If the camera has an all mechanical shutter you can probably set it to "B" mode and use velcro straps or a cable tie to hold the shutter button down to keep the shutter open. If this isn't possible you'll have to snap the shutter on the longest time setting so you have time to get your finger in there to hold it open, then tape, glue, or otherwise force it to stay open. If the shutter can't be operated at all you can always cut through it:
image
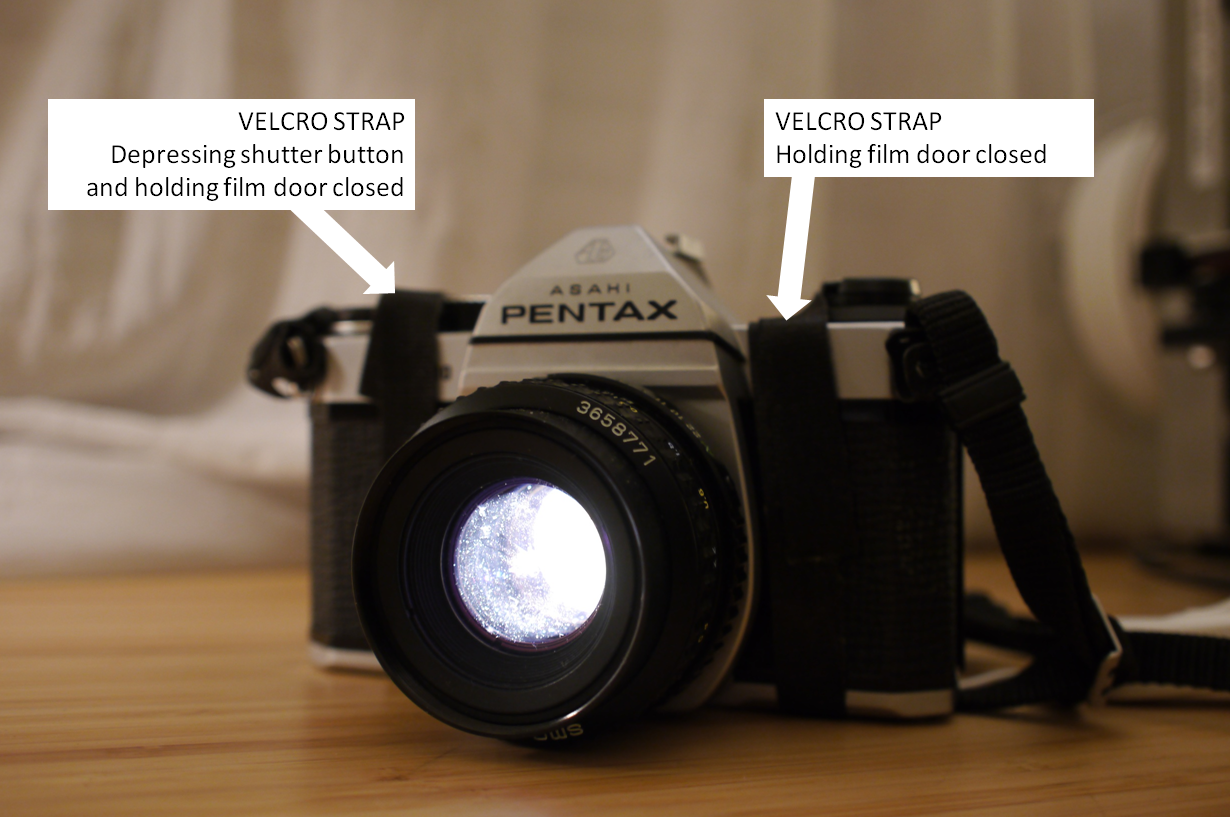
Close the film back as much as possible. I secure it with double-sided velcro strips:
If you want to get fancy you can drill a hole and run the Jansjo wire through before re-solding it.
Notes on beam quality:
Application ideas:
The nice thing about a concentrated spot light is that it can be located so remotely from the thing being illuminated that the light can appear to come from nowhere at all, so they can be used for creating surprising highlights on objects of interest:
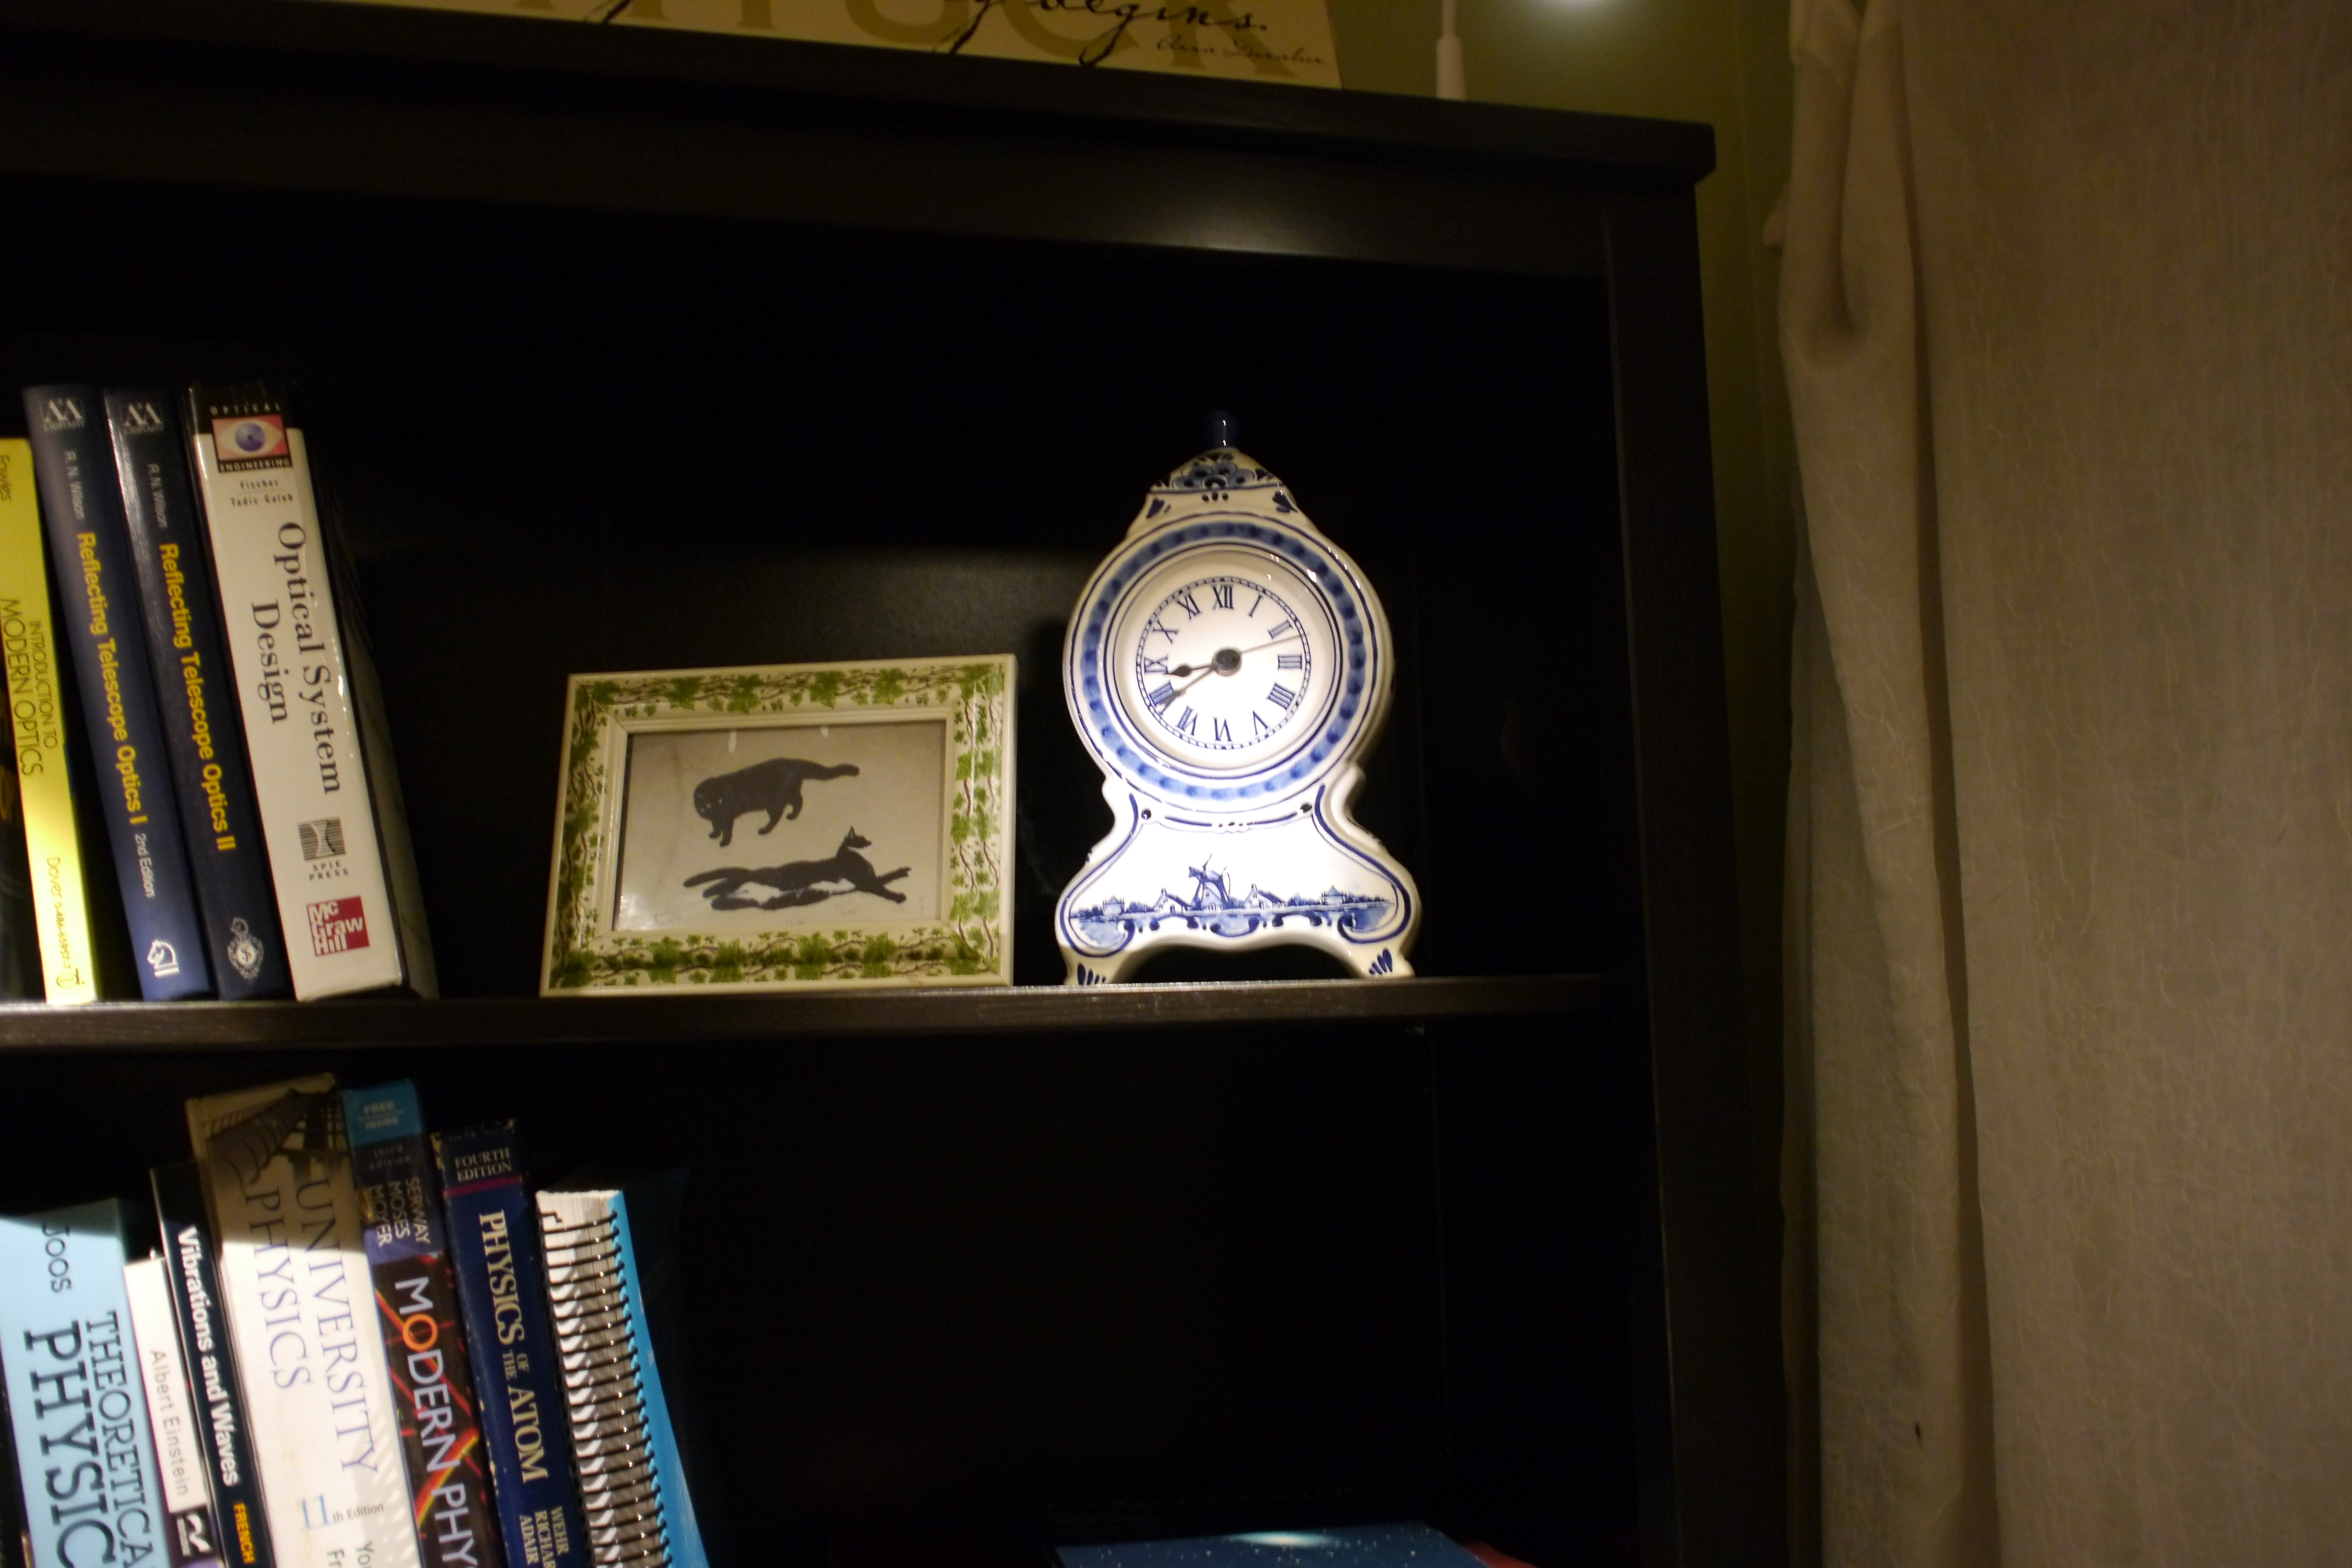
Or my favorite, you could aim it at some optical component: Prisms, diffraction gratings, beamsplitters, dichroic optics, and even lenses can be used as targets to redirect light and splash color around a room in striking ways. The output from any of these target optics can in turn be directed at an object of interest in the room:
image
Put some of the magic back into a discarded film camera and turn it into an interesting indoor spotlight for about $10 and 30 minutes.
The idea is simplicity. You just want to put a light in place of the film in a camera and the camera becomes the reverse of a camera (it become a projector). Very many incarnations of this arrangement can be imagined and what I show below is but one. Any camera can be used although SLRs are plentiful and well suited.
Note, the below instructions will result in a camera heretofore unusable for taking pictures because the LED is glued in place. Also, the cheapest single illumination LED with power cable I've found is the guts of a Jansjo Ikea desk lamp (the version with the weighted base goes for $10), and that too will be destroyed. A nice alternative if you don't want to hurt any cameras or Jansjos is to open the camera's film back and position the Jansjo so that it's pushed into the rear. The shutter will need to be held open which will only happen non-destructively with an all-mechanical shutter that can be kept open in "B" (bulb) mode. While the result is not as elegant as the instructions below this will serve the purpose of using the camera's optics to create a concentrated spotlight for creative lighting.
Find an unsuspecting Jansjo, or any compact white LED intended for illumination (not indication). LED tech is changing fast but right now the best option I've found from a cost-vs-simplicity standpoint is one of these here Jansjos. You get a bright LED with a power switch that you can plug right into an outlet:
image
Pry off the plastic lens and remove the LED:
image
The cord will need to be cut:
image
And soldered back together:
image
Attach it to the back plate on the camera. Epoxy works well:
If the camera has an all mechanical shutter you can probably set it to "B" mode and use velcro straps or a cable tie to hold the shutter button down to keep the shutter open. If this isn't possible you'll have to snap the shutter on the longest time setting so you have time to get your finger in there to hold it open, then tape, glue, or otherwise force it to stay open. If the shutter can't be operated at all you can always cut through it:
image
Close the film back as much as possible. I secure it with double-sided velcro strips:
If you want to get fancy you can drill a hole and run the Jansjo wire through before re-solding it.
Notes on beam quality:
- Be sure the camera lens is wide open (smalles f-number), unless you want the light to be dimmer.
- If the LED winds up sufficiently close to where the film would have been, the camera can be focused so that a sharp image of the LED's phosphor (white LEDs have a phosphor) is seen. To my eye this image has too much structure to be appealing so I intentionally defocus the lens.
- You can vary the projected spot size by choosing a different focal length lens. Longer focal lengths equal tighter spots.
- If
you want a less concentrated spot the most efficient way
would be to mount the LED so that it's closer to the lens than it would
be if mounted directly to the film pressure plate.This combined with a
fast lens will ensure as much as the divergent light from the LED makes
it through the aperture.
Application ideas:
The nice thing about a concentrated spot light is that it can be located so remotely from the thing being illuminated that the light can appear to come from nowhere at all, so they can be used for creating surprising highlights on objects of interest:
Or my favorite, you could aim it at some optical component: Prisms, diffraction gratings, beamsplitters, dichroic optics, and even lenses can be used as targets to redirect light and splash color around a room in striking ways. The output from any of these target optics can in turn be directed at an object of interest in the room:
image